- Continue Shopping
- Your Cart is Empty
June 25, 2014

10 Festival Essentials to Pack Away
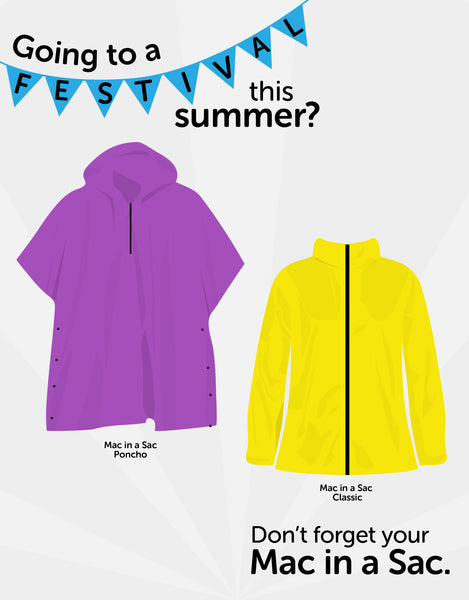
Flips Flops or Rain Boots?
Before deciding what to bring with you to a festival, it’s usually a good idea to check the weather forecast. Our expectations might not be that great, given the history of the “Great British Summertime”, but we can always bring our flip-flops in hope of a bit of sunshine!
The MET Office have posted their event weather forecast for Glastonbury 2014, and the bad news is that Friday and Saturday are not looking that great, with a mixture of light rain and heavy showers. Hopefully, it’ll not be as bad as the 2009 Glastonbury Festival where we saw torrential downpours accompanied by Thunderstorms, but it would be well worth being prepared (see point 8!) for what the weather brings.
The Good News is that we’re offering a special festival 15% OFF on our website with the coupon code:
FESTIVAL15
What Should I Pack For a Festival?
- Festival Ticket & ID
- Money / Cards / Keys
- Tent
- Sleeping Bag
- Rolling Mat
- Toiletries (don’t forget the loo roll!!!)
- Reusable Water Bottle
- Waterproofs (Packaway Festival Poncho & Rain Boots)
- Sun / Rain Hat
- Oh, and some handy extras: Bin Bags (for dirty clothes & rubbish), First Aid Kit, Torch, Bug Spray, Money Belt, Dry Shampoo & A Portable Phone Charger
Festival Fun
Finally, we want you to 'Get Out There' and have a great festival, so we compiled this shortlist of Festival Fun:
The Guardian have an interactive game to test your festival brain - Key challenges include ‘Can you navigate through the festival without visiting a single toilet?’ ‘Can you manage not to lose your phone signal while talking to your mum?’
Over at Mashable, you can find ‘13 Apps For the Best Festival Experience’ including the AccuWeather App and Glascovery.
Glam Up for the Festival and get the glitter out with 'The Festival Beauty Edit: Make Up’ guide from glam.com.
Worried about not finding a data connection? Find a Wifi Cow:
Get festival updates via Whats App:
For Full Festival Information, go to the Glastonbury 2014 Website:
June 12, 2014
Lucy Stevenson
What size is a Mac in a Sac when it's all packed up?
This week we are exploring our Packaway range. In total, we offer many packable products to choose from. These products are of course designed to pack up small enough to easily carry in your bag when the sun comes out. Two questions we are frequently asked are:
1. "What size are the jackets/overtrousers when they are packed up?"
2. "How much do they weigh?"
This blog post is designed to answer these questions. We have measured the length, width and depth of each product and weighed it too so you can be sure which one is best for you.
Below, we have included all of the measurements of our Mac in a Sac (Adults & Kids), Mac in a Sac Overtrousers (Adults & Kids), Mac in a Sac Poncho, our Unisex Travel Coat and previous versions.
We have also taken a picture of each product all packed up to give you an idea of what it looks like. Match the number to the picture to see how each jacket looks when it is packed away.


May 28, 2014
Lucy Stevenson
How to use a 2-way Zip

The 2-way zip is a popular feature of coats in our Country, Outdoor, Xtreme Series and Kids collections. From time to time we are asked questions about its use and the general purpose of it. We decided to put together this helpful post to provide a few hints and tips describing how to use it and why we think it's such a great feature.
What is the purpose of a 2-way zip?
2-way zips are designed to open from the bottom of the zip as well as from the top. This is to give you more room at the hem of the coat so you will be more comfortable when you are sitting down. It is also ideal for just letting in some air or retrieving something from a pocket underneath without having to undo the whole zip.
How do I use my 2-way zip?
Below is a simple diagram to help you use your 2-way zip correctly. You just need to make sure that both parts of the zipper are firmly seated at the bottom before inserting the free zip edge into both, then pull the top slider upwards while holding the bottom slider firmly in place to zip up the coat. You can then easily pull the bottom slider up to open the coat from the bottom.

If there is anything else you would like to know about 2-way zips, just drop us a message on any of our social media sites.
For a higher resolution version of the diagram, click here
April 09, 2013
Lucy Stevenson
How to Dress for any Weather
It's fair to say that weather in the UK is … variable. Our green islands are influenced by the Atlantic Ocean, as well as tropical and polar air from the Continent.
With this in mind, you'll need to be prepared for all eventualities - Rain, Sun, Hail, and Snow...
How to Dress for Rain

Light Rain
Getting outside in wet weather doesn't have to leave you in a wet, sodden mess. When just a little rain is falling, you're best to use a lightweight, packaway raincoat. This type of jacket is waterproof enough to make sure you'll stay dry, but still packs away into a tiny bag for handiness.
Heavy Rain
When the rain really gets going, you'll need to have invested in a waterproof jacket that can handle the deluge. Look for technical outdoor jackets with high water column values (8000mm+). Features such as water resistant zips, storm flaps and peaked hoods can also help.
How to Dress for Sun

Our favourite type of weather. Keeping cool and non-burnt is what it's all about here. There's plenty of clothing to choose, from any number of high street shops. Lightweight, breathable clothing and a hat are best, but be sure to use high factor sun cream and stay hydrated too. Oh, and take the opportunity to get ice cream!
How to Dress for Hail (?)

We're not sure why we included this one, but it's a type of weather, so why not!
Hail in the UK isn't too frequent, but when it happens it can be nasty.Interestingly, the largest hailstone that was found in Horsham in 1958. It weighed a massive 190g - just bigger than a cricket ball! If you're heading out in hail, the best choice would be a soft shell jacket with a peaked hood to keep it off your precious face. Just avoid the cricket ball hailstorms.
How to Dress for Snow

With snow falling at unseasonable times of the year, it's better to have a few pieces of suitable clothing at the ready. Wellington boots are great for keeping your feet dry, and work really good with waterproof trousers over the top. Thick socks underneath that, and you'll be throwing snowballs longer than everyone else.
Most types of waterproof jackets will keep you dry, as long as they are regularly washed and re-proofed. What you'll need to make sure of is a decent fleece mid layer to keep you warm. Couple this with a pair of waterproof gloves and a wooly hat for full preparedness.
February 11, 2013
Lucy Stevenson
Outdoor Gear Explained in Easy Terms

Struggling to make sense of Hiking clothing? We've taken the mystery out of the confusing terminology that outdoor brands use, and made this free guide for you. We'll cover the main types of clothing systems and fabric types that you'll come across online or in outdoor shops. The next time you want to get some new gear, you'll know what to look for, and how it can help your journey!
- Layering
- Alternatives to Layering
- Outer Layer Styles
- Walking Trousers
- Hiking Boots
- Hiking Socks
- Gloves & Hats
- Rucksack Fitting
- Clothing Maintenance & Repair
What is the layering system and why should I use it?
'Layering' or 'The Layer System' is a way of using multiple pieces of outdoor clothing to stay warm and dry. Done correctly, it can make your day in the hills much more enjoyable! Read on...
Base layer
A base layer is a thin material of clothing that is worn next to your skin. Typically made from Polypropylene, Merino Wool or blends of man-made and natural fabrics, they work by wicking (taking sweat away) from your skin. The material causes the sweat to be dispersed over a larger surface area, to be dealt with by the next link in the chain - the mid or outer layer…
Note that polypropylene dries a lot quicker then merino, but it does seem to get smelly very easily. Merino on the other hand, can be worn for up to two weeks without getting stinky (I tried it).
More recently an American company called Cocona® has developed a natural technology that can supercharge the performance of base layers, wicking up to 5 times faster than pure merino. Using Coconut Husks and other natural micropore materials, they use a patented process where they embed active carbon into the yarn. This increases breathability and accelerates evaporation by pulling the moisture across the particles in the yarn. Cocona® technology will not wash or wear out, and also absorbs a wide range or odours.
British Company Rab® have been one of the first brands to use this technology, blending Merino with the natural Cocona® for their MeCo range of base layers. The same technology can also be used for jackets, mid layers and socks so you can expect to see more brands teaming up with Cocona® in the not too distant future. For more info, see this MeCo review from Outdoors Magic.
Mid Layer
Mid layers go on next after the base layer, and work to provide extra warmth. They can be taken off or put on without affecting the layering system. Generally they're a smock (1/4 zip) or full zip fleece, but some can zip into an outer layer in order to make what's referred to as a 3 in 1 Jacket. Fleece breathes well, allowing the water vapour produced by your body to be taken to the outer layer.
Outer Layer
Outer layers provide the waterproofing and wind-resistance. This is where you'll probably spend the most amount of money, but without the other layers, they won't work nearly as well. So don't be tempted to scrimp on the system!
At a basic level, they work by allowing water vapour (sweat) out, but stopping water coming in. When you're working hard in the mountains, your body will cool itself by sweating - this vapour will build up (condensate) on the inside of a non-breathable jacket, so be sure to invest in one that breathes.
Breathability varies from jacket to jacket, the higher the number, the better it breathes. Have a look at our Technical Gear Definitions for extra help.
Which Outer Layer Fabric should I choose?
Waterproof Jackets come in many shapes and sizes, but here's a quick breakdown of the most popular fabrics & styles for the outdoors:

Gore Tex®
Uses an expanded PTFE Membrane layer (the same stuff used in plumbing tape) to stop water coming in, whilst allowing water vapour to escape. PTFE is easily damaged by oil, dirt etc, so in order to protect it, Gore Tex® uses a uniform spread of PU (polyurethane) coating on the membrane. Regular cleaning using Nikwax is recommended.

eVent®
This PTFE fabric is known to be more breathable than classic Gore Tex®, as it uses a gas to apply their PU coating. What it means is that you'll need to look after it a little more by regularly cleaning it. It will also be cooler than a Gore Tex® Jacket, so you will need to adjust your mid layer thickness in winter.

Soft Shell
This is a very versatile outer layer that is generally made from a soft, stretchy, tight weave fabric with a DWR (durable water repellent) coating. Swiss company Schoeller is best known in the outdoor industry for their soft shell development. They aren't waterproof as such, but highly water resistant, windproof, and up to three times more breathable than a membrane shell jacket. Soft shell outer layers are great for high energy outdoor activities like skiing, where less breathable jackets don't perform as well.

Manufacturer's Own Fabric
Some manufacturers (like us) have designed their own outer layer fabrics. You'll get better value as there isn't a licensing fee to pay, but the range won't be as technical as some other brands. Saying that, own brand fabrics are a great option for those who don't need ultra-performance and are on a budget.
Are there alternatives to the Layering system?
Páramo®
Instead of using a membrane to keep you dry and warm, Páramo utilise pile fur with a water-repellent shell outer. Their fabric is a little heavier, quite warm, and strictly speaking, not waterproof by itself. When your body produces water vapour, their pile sends it to the outside of the jacket continually. So as long as you keep moving, you'll feel the benefits and feel dry- it doesn't matter if it gets soaked. It 's recommended to wear it next to the skin, and you'll need to wash & reproof it regularly too.
What Style of Outer Layer is best for me?
Climbing-Fit Jackets
A shorter jacket that's designed to accommodate a climbing harness. Fabric around the arms and shoulders is cut so that it doesn't 'ride up' when climbing. Most brands tend to offer high-end waterproof fabrics in this style as there's a need for performance.
Longer Length Jackets
Outdoor jackets that drop a little below the bum, offering a greater degree of rain and wind protection. Recreational walkers find this style to be best for their needs.
Packaway / Packable Jackets
When there's a need to save space and weight, you should consider a Packaway Jacket. Our Mac in a Sac Jacket packs into a bag just slightly larger than a drinks can, and it weighs less than 300g.
Technology-wise, packaway jackets can vary in breathability and waterproofing, which is why we decided to offer the best performance for our price bracket. High end packaway jackets can offer more specialist running or cycling features, pack down smaller and may be made from a lighter, more technical fabric, such as Pertex®, but are more expensive.
Insulated Jackets & Coats
Down and synthetic insulation jackets are designed to trap your body heat, so they're great for cold, dry seasons where you aren't likely to get too warm. Down is the warmest and most compressible of the two, but doesn't work when wet, and is difficult to wash and dry. Some brands have recently launched jackets with water repellent down to reduce this effect.
Synthetic Insulation like Thermolite or Primaloft can be washed easily, and still performs when wet but breaks down over time.
Full Length Outdoor Coats
This style is also referred to a drover, full-length or trench coat, and offers a greater level of rain protection for your legs. They can be 3/4 (calf) length, or full length. They're not really suited to the mountains though - best to use these for walks in the park, country pursuits or watching sport.
Choosing Walking Trousers
Go for lightweight, synthetic or synthetic blend walking trousers. They'll be the best at drying quickly, and will be most comfortable. Some have handy pockets for a mobile phone, but always be careful not to get soaked in a rain shower and ruin it!
There are walking trousers that are waterproof with taped seams, which have a softer handle (less crinkly). We've designed a pair called the Expedition, which should be arriving in February.
Winter lined walking trousers
When the temperatures drop, winter-lined trousers can help to keep you warm. Don't be tempted to use them in summer though, as you'll end up with sweaty legs!
Do I need Waterproof Overtrousers?
You'll need these to keep dry when outdoors, especially in the UK. Overtrousers come in a variety of fabric types and prices, just like jackets. Extra breathability will be more expensive, but for a lot of wet-weather hikers, a decent pair to put on in a downpour will do the job nicely. You might consider Packaway Overtrousers to save space in your rucksack too.
In order to get overtrousers on in a hurry when it starts raining, some versions come with longer zips at the ankles to allow you to keep your boots on. Lined overtrousers tend to have a mesh or taffeta lining on the inside - this keeps your skin away from the outer layer and sticking to it. The only disadvantage with linings this is that they won't pack down as small as an unlined version.
Hiking Boot Fitting Tips
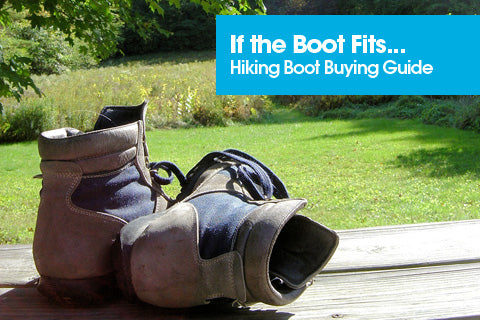
When it comes to buying a new set of Hiking Boots, you're best to take your time, and get expert advice. Go to your local outdoor shop for a boot fitting and make sure the boot fitter:
- Measures and evaluates your feet using a Brannock Device - length, width, & shape
- Asks lots of questions about what sort of walking you intend to do
- Recommends a number of suitable boots based on the above
- Offers a pair of walking socks to use when trying on boots (if you didn't bring some)
When trying on a pair, you'll need to be aware that not all boots will fit you (sorry to disappoint). All boot manufacturers design and make boots that using a different interpretation of the average human food size. So with this in mind, don't get your heart set on a particular pair- listen to the boot fitter!
A good boot fitter will be able to advise you on how to lace a boot properly, and if you need to use a different technique. This excellent resource from Section Hiker should help.
Be conscious of how supported your foot and ankle is when walking, and if possible walk around the shop, up a set of stairs, and if the store has one, a boot ramp. To prevent blisters, you need to look out for any slippage in your heel area, and if your foot slides forward when walking down a slope. If your foot slides, there's always the danger of your toenail rubbing on the front of the boot, causing discomfort, and damaging the waterproof liner. It's always a good idea to keep your toenails short too.
How to choose Hiking Socks

Choosing a pair of hiking socks doesn't need to be a complicated process, but there are a wide number of choices out there. The weight (thickness) of socks that you should get depends on the type of walking you plan on doing, as well as the outside temperature. You wouldn't want to roast your feet in the middle of a spanish trail in summer by using winter socks…
What Hiking Sock Weights are available?
Lightweight socks are the most breathable, so are best suited to light-moderate walking trips in warmer weather. The trade off is that they aren't able to offer as much cushioning.
Midweight socks are the go-to choice for most hikers. A nice combination of cushioning, breathability and warmth for trails and walking in national parks / mountain ranges.
Heavyweight socks are a winter-only option, and are most used by those heading to snow-clad mountains in their alpine boots. Lots of all over cushioning and warmth!
What Hiking Sock Fabrics are available?
- Traditional Wool - warm, but can be itchy and soaks up moisture
- Merino Wool - warm, soft and not smelly
- Synthetic - breathable and well cushioned in key areas. Long Lasting.
- Merino / Synthetic Blend - taking the good bits of both
- Cocona® or Bamboo Yarn Additives - improved breathability and eco-credentials.
What features should I look for in a Hiking Sock?
- Cushioning around the toes, and ball of the foot
- Cushioning on the shin area
- Breathability - some socks have thinner material on the top to help
- Length - winter socks tend to be longer
- Fabric Braces to reduce slippage (though the boot fitting is more crucial)
Gloves & Hats
Keeping warm when outdoors is easy with the right preparation… The gloves you choose should reflect the conditions that you intend to go out in - if you have bad circulation, you should consider mittens or 'lobster' gloves (the index finger is separate) to retain a little more heat. Alternatively, glove liners can add extra warmth.
If you intend on using ropes or harnesses for climbing however, you probably want a pair of waterproof-lined gloves for a little more dexterity. I've used Sealskinz Ultra Grip Gloves for a range of different activities, and they're a great all-rounder.
Hat-wise, there's no need for ridiculously over-furry hats, inspired by Mother Russia. Keep it simple with a fleece-lined beanie. We've always been impressed with the Extremities range from Terra Nova equipment. Check out their power fleece banded beanie as an option.
How do I make sure my Rucksack fits?
With a longer hiking trip, comes the added weight of extra gear. We recommend taking the time to visit a good outdoor retailer for a rucksack, as there's a lot of variation in people's body shape and individual needs. You want a pack to be comfortable, as you'll enjoy the outdoors much more. Things to look out for:
- Don't go with a set idea of what to buy - get the best fitting rucksack for you.
- If you're a smaller person, you'll be drowned by a 85 litre bag - try a 65litre or smaller.
- A shop assistant should be able to fill the bag with heavy items to simulate your typical day.
- Rucksacks work best when the bulk of the weight is placed on the hip-belt, NOT the shoulders.
- Learn from the experts to adjust the back padding and shoulder straps and get the best fit.
- If you want a Rucksack for travelling, consider one that has a zip-off day bag.
[Thanks to Trail Magazine for this handy Video]
The need for Clothing Maintenance & Repair
Looking after your gear isn't too hard, just follow some simple guidelines:
Washing & Reproofing
Regularly wash & reproof waterproof clothing using Nikwax or Soap Flakes. Regular detergent will ruin your gear, so please don't use it! Remember to follow the instructions on the packet and on the care label of your item.
Boot Care
Clean your boots after each walk using a damp cloth. Don't set leather boots on, or near a direct heat source to dry, as it can dry the leather out and cause cracking. Reproof leather or fabric boots with Nikwax Leather & Fabric Proof.
Rips & Tears
You can temporarily repair a hole in breathable fabric using a Gore Tex® patch kit. Send it to an approved repairer when you get home though! Check out our previous blog post on professional outdoor gear repair.
Have we missed anything? Let us know by getting in touch, and we'll keep this resource up to date.
If this guide has been helpful to you, please share...
↓
© 2025 Target Dry | E-commerce by WeMakeWebsites


Lucy Stevenson
Author