- Continue Shopping
- Your Cart is Empty
February 11, 2015

A Beginner’s Guide to the Mournes
This week kicks off a four week series of beginner’s guides to some of the most popular hiking areas in the UK. Stay tuned for posts on Scottish, English and Welsh territory coming up in the following weeks. We’re sharing everything you need to give you a good start, where ever you may be headed in the UK.
This week, we’re starting off with our homeland, Northern Ireland.
The Mourne Mountains (or the Mountains of Mourne) form the highest and most dramatic mountain range in Northern Ireland. With breath-taking views across the Irish Sea and an intricate map of weaving paths to explore, they are high on any keen hiker’s to-do list.
The mountains can be divided into two distinctive areas: the Eastern, or “High Mournes” and the Western or “Low Mournes”. Below is a map of the mountains to show this. The Mournes are well known for providing a wide variety of stunning scenery for a relatively small geographical area.

Sourced from walkni.com
The area of the Mournes is compact and navigation is usually straightforward. The Eastern Mournes are laid out in the shape of a trident with two large valleys running from the north to the south, separating the three 'prongs' of the trident. West of this area, there is another group of high hills which centre on the twin peaks of Eagle Mountain and ShanSlieve before sloping to lower hills which then continue west and south towards the small village of Rostrevor.
Our Top 3 Routes
Slieve Donard from Newcastle
We’re starting with this route as it is perhaps the most popular walk in the Mournes. In fact, it’s been so popular that considerable erosion has become evident in recent years, causing the need for renovation work on the path. It is the normal and most direct route up Slieve Donard, the highest peak in the Mournes. It should take around 2 ½ hours at a decent walking pace to get to the top.
Start in the Donard car park in Newcastle and follow an obvious path at the back of the park which leads into the trees. Follow the path up the left bank of the Glen River where you will come across a bridge. Cross this bridge and turn right to ascent the left bank of the river, with waterfalls on the right. Here you will come to a second bridge. Cross this and continue again on the left bank past more waterfalls to a third and final bridge. Do not cross this bridge, but continue up a rocky track to a gate which gives access to the open mountainside.
Continue straight ahead with the Glen River on the left and forest on the right. Near the head of the valley, turn left to cross the river. The path, which is well worn and has been substantially re-engineered in recent years goes directly up, then curves right on to the flat saddle between Slieve Donard and Slieve Commedagh. Walk in a southerly direction to intercept the Mourne Wall. Turn left along the wall to head for the top of Donard.
The final part of the hike climbs beside the wall directly up to the summit of Slieve Donard. This part is especially tough as it is a continuous slope for 1000 feet, but increasingly impressive views over the Mourne countryside make the slog a little easier to bear.

Slieve Binian from Carricklittle
This route is the most direct route to the top of Slieve Binnian. It begins in the Carricklittle car park. This is at the junction of the Head Road and Oldtown Road near Annalong. The route is quite tiring, though the views are very impressive. This route should take about 2 hours to get to the top.
From the car park go up the track which runs north before it curves west to join the Mourne Wall at a gate and stile. Cross over the stile and continue straight with the Mourne wall on your left and a fence on the right. The track then curves right to follow the south western edge of the forest. Leave the track and go directly along the side of the wall. It runs fairly straight for half a mile up a steady slope.
The wall begins to veer left and left again while the slope steepens, ending finally against the summit tor of Slieve Binnian. The Summit cannot easily be gained from this point. Move right along the base of the tor and make your way up steep grass and heather slopes to a gap. Turn left here and climb a rock step. Cross the rock slabs with care to get to the final step up to the summit. You will find an old metal fence post at the top. Take extra care at the last part of this climb as strong winds or snow and ice will make this route particularly hazardous.

Trassey to Bloody Bridge
This route is a moderate linear walk for those of you who would prefer a less challenging walk. It links the Trassey Track and the Bloody Bridge via the Brandy Pad. You can see sights such as the Mourne Wall, the Castles, Slieve Commedagh and Slieve Donard on this walk.
To begin, turn left out of Trassey car park. You will see double gates and a stone stile to mark the start of the Trassey Track. Continue straight ahead up this quarry track and pass through another 2 sets of double gates. The path becomes steeper and steeper as it follows the river. Continue up the Trassey Track towards Hare's Gap which is the col between Slievenaglogh and Slieve Bernagh. Cross over the Mourne Wall using the stile and veer left, onto a well-worn track called the Brandy Pad. Continue along this track for 3 km where you will pass three large mountains: Slievenaglogh, Slieve Corragh and Slieve Commedagh, which is the second highest peak in the Mournes. You will come to some stone steps which lead up to the col between Slieve Beg and Slieve Commedagh. Veer left on the col to pass underneath the craggy outcrops of the Castles which will be on your left. Continue on the main path which follows around the base of Slieve Donard to meet the wall at the Bog of Donard. Cross over the Mourne Wall and keep on the track which follows down the Bloody Bridge River. When you come to a quarry, cross over the Bloody Bridge River and continue along the well-worn quarry track. Follow the track to the left towards the Bloody Bridge River and then cross the river using conveniently located boulders as stepping stones. Follow this river downstream, crossing a wooden footbridge over the Glenfofanny River. Keep following the river down towards the coast and turn left when you come to the Ballagh Road. The Bloody Bridge car park will be 20m away on the opposite side of the road.

Little-Known Facts
The Mourne Wall
A famous landmark, The Mourne Wall runs through the Mournes, over the top of no less than 15 mountains, is an impressive 22 miles in length and runs over the summit of the highest peak: the Slieve Donard. Its main purpose was originally to keep cattle and sheep out of the water catchment area of the Silent Valley reservoir but has since become a useful guide for hikers and an impressive sight to visit. Completed in 1922, the wall took over 18 years to finish with many skilled local tradesmen employed seasonally to build it. The wall still stands up to 8ft high and 3ft wide today.

Smuggler’s Haven
Illegal cargo ships stocked full of prohibited packages of tobacco, wine, spirits, leather, silk and spices docked at the foot of the Mournes in Newcastle during the 18th and 19th Centuries. The smugglers would then load horses with these illegal products and trek through the Mourne Mountains to Hilltown. Trade was so good and the route was so widely used that a track was soon worn away by the hooves of the heavily laden horses. This old track is still there today and is a popular walking route among hikers, appropriately known as "The Brandy Pad".
January 14, 2015
Lucy Stevenson
Target Dry’s Tips for Your Frosty Morning Commute
Remember when snow and ice used to be a good thing? We’d wake up to a white canvas on the other side of our curtain and jump for joy at the news of a school closure. Not anymore! If you are part of the working world, those days are well and truly gone. With the recent dramatic fall in temperatures, this past few days we’ve been waking up to a winter wonderland outside our back door and wondering how on earth we are going to manage the journey to work. Instead of wishing for it, we’re praying the snow doesn’t come and cursing it when it does. But not to worry- just follow our tips to beat the freeze, and we’ll make sure you get to work safely and on time.
Driving
If you are one of many people taking your car to work every day, you will no doubt notice a huge change in traffic when the weather is bad. Even a heavy downpour of rain can turn a 20 minute commute into half an hour. The first piece of valuable advice we can give you is to ensure you have plenty of time. Time is key. If there is a wintry forecast on the cards for the morning, make sure you allow yourself a good extra 20-30 minutes.
Follow these tips to make sure your car remains functional in snow and ice:
- Cover your windscreen before you go to bed. You can get covers made especially for your car, or just use an old blanket or even a black bin bag if you don’t have one of these. This will save you a lot of time de-icing in the morning!
- If you don’t cover your windscreen, you will no doubt wake up to a thick layer of ice obstructing your view in the morning. Do not be tempted to bring the kettle out to get rid of it as the sudden dramatic temperature change can cause your windscreen to crack. Use de-icer and a scraper and just be patient. If you are in a hurry, you can use cold water to help.
- Turn your car on while you are de-icing it. The temperature from the air inside will help the defrosting process.
- Remove any snow from around the wheels and roof. The roof is particularly important as any lying snow could fall onto your windscreen while driving making it very dangerous!
- If you have a long commute, you might want to pack some extra supplies in the boot of the car just in case you might end up stranded somewhere. We recommend extra blankets, jump-leads, food and water.
- When you finally get on the road, make sure you drive slowly and carefully. Do not misjudge how treacherous the road conditions are. Even if they have been well gritted, take extra care for black ice. It is a good idea to stick to main roads where possible.
- If you have the option to leave the car at home, do it. Accidents are much more likely in poor driving conditions and you are better to be a little inconvenienced that involved in a crash. Safety first.
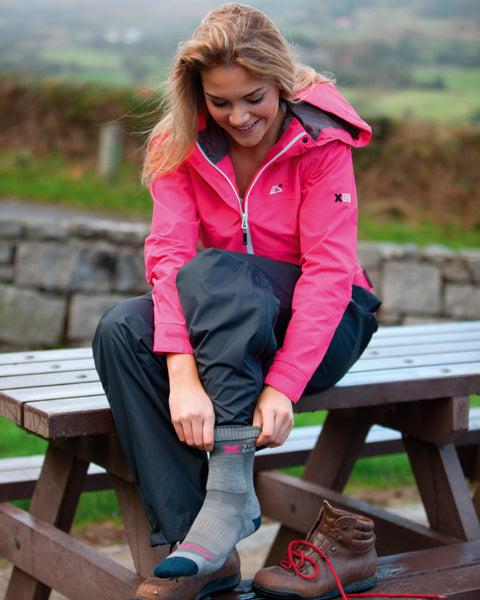
Walking

If you live close enough to your work to walk in, or even just walk as part of your journey, you will need to make sure you are well prepared for the icy conditions. Here are our top tips for battling the wintry elements on your walking commute:
- Allow yourself a lot of extra time. Depending on how far you need to walk, we would advise allowing anything up to 40 minutes extra. A good general guideline is to allow twice as much time as it normally takes for walking.
- You will need layers and a thick, insulated, waterproof coat. Your stylish yet flimsy work blazer is no good today!
- You will also need a good pair of waterproof wellies or snow boots to keep your feet warm and dry until you get into work. It’s a good idea to pack a small backpack with shoes that are perhaps a little more office-worthy for when you get there. An extra pair of socks are useful too in case your waterproof boots fail you.
- The pavements can be very dangerous when there has been a snowfall. Unlike the roads, usually the pavement will not have been gritted. Try to avoid routes that take you up or down steep hills as there will be increased chances of slipping and falling- we know this is easier said than done!
- If you are nervous about the slippery conditions, you could try adding a pair of spikes to your boots. You can get these online or in most good outdoor shops.
Cycling

If you take your bike to work, you are also at risk in the deep freeze although you don’t have to leave your bike at home! Follow these tips to make sure you stay safe while you cycle in the snow.
- Avoid dark clothing as you want to make sure you remain visible to motorists and pedestrians. Reflective clothing and ideally a flashing light are perfect for making sure you are seen.
- Try and stay out of the gutter if you can as this is where most of the ice will build up. Sticking to main roads will also be much safer as these will normally be gritted before the first flow of traffic.
- Make sure your bike is ready for the winter before taking it out in icy conditions. Lower your seat by 5cm to lower your centre of gravity. This will give you more control and enable you to get your foot down more easily should you need to stop quickly or steady yourself. Consider adding slightly wider tyres to your bike to increase grip and improve traction.
- As always, don't forget your helmet! You are at a much higher risk of being in an accident when you go out on your bike in the snow.
Hopefully you find these tips helpful when you find the conditions difficult. If you think of anything else useful that we have left out, feel free to drop us a line on social media.
January 09, 2015
Lucy Stevenson
Top 10 Things to Pack in Your Rucksack

New Year, new you? After the Christmas season of cheer and indulgence, the cold harsh reality of January can be tough when it hits. The best thing to do to brighten the New Year is to set yourself some healthy goals to achieve. Buy yourself a new healthy eating cookery book and aim to cook out of it at least 4 times a week, or set yourself a new fitness regime and stick to it. This week we’re exploring the possibility of a new hiking routine- explore the countryside and get fit all at the same time? Sounds good to us. Here’s what we’re putting in our rucksack:
1. First Aid Kit
The first and most important thing on our list is a first aid kit. Hopefully you won’t need it, but you never know when you could get a bad cut or scrape in the undergrowth. You can buy these ready-made from the chemist but if you’re throwing it together yourself, you will need to include anti-sceptic cream and assorted sizes of plasters. Don’t forget extra blister plasters too! We recommend Compeed. They’re awesome.
2. Energy Food
Now we know this post is all about getting in shape. New year, new you and all that jazz. BUT there is simply nothing worse than finding yourself being peckish on the top of a mountain. Tired. In the rain. With sore feet. While hiking, you will use a lot of energy so you need to keep those energy levels topped up frequently. It doesn’t need to be wildly unhealthy either, you could try something nutritious like celery sticks with peanut butter or a packet of tasty dried fruit. Or if all else fails, a good dose of Lucozade should sort you out.
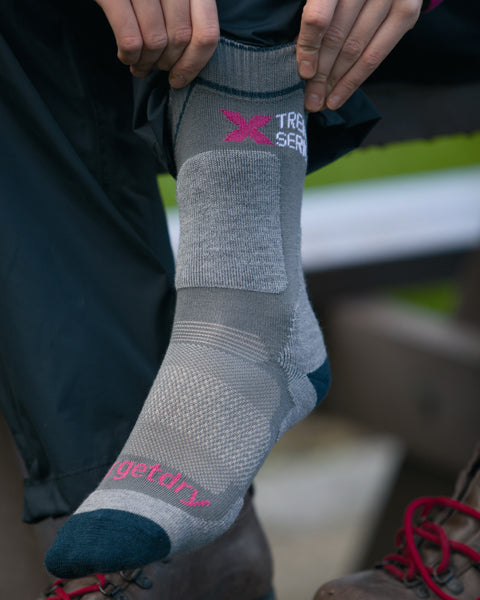
3. Spare Socks
If you happen upon an unexpected area of marshland, chances are your feet could get wet very quickly. A spare pair of hiking socks will provide much appreciated warmth and dryness to soggy feet that will no doubt be feeling very sorry for themselves.
4. Map & Compass
Smart phones and their new-fangled navigation apps are all well and good- until they run out of battery. Keep a good old fashioned map and a compass with you and you will always be able to work out where to go.
5. Towel
I don’t know about you, but I don’t fancy falling in an ice cold river in the middle of January. But it could easily happen. This is Britain. It is very cold in winter and you never know what the weather will throw at you. Best to be prepared for the worst and a small towel will definitely come in handy, even for sponging the sweat off your forehead when the going gets tough. Remember: no pain, no gain.
6. Spare Layers
It can get particularly chilly the higher up you climb on your hike. Remember to pack an extra fleece just in case you are feeling the chill or if you get caught in an unexpected downpour.
7. Packaway Jacket
You will need a light waterproof cover up you can pull out and throw on over your clothes quickly when the rain comes on. We would recommend both a jacket and a pair of overtrousers to ensure you stay as dry as possible. Eh, hello Mac in a Sac!
8. Torch
Just in case you are still on the go when darkness falls, you will need a small torch to see where you are stepping. Remember you want to avoid getting that first aid kit out at all costs.
9. Water Bottle
It is very important to keep yourself hydrated on your hike so make sure you include a good full water bottle in your rucksack. You can buy all kinds of fancy ones in an outdoor shop to keep your water cool and make sure it doesn’t leak.
10. Rain Cover
More of an essential if you are hiking over a longer period of time, but a rain cover for your rucksack can be very useful for ensuring your valuables stay dry when the rain comes on. Not ideal if you reach for your spare set of dry clothes only to find they’ve been drenched too!
So there you have it: our top 10 items to carry in your backpack. All that’s left to do is throw it all together and get out there! Good luck with your new training regime!
November 19, 2014
Lucy Stevenson
How To Choose Hiking Socks
When preparing for a hiking trip, socks can be a bit of an afterthought with your choice of fleece, coat and over-trousers taking priority. Truth is, your socks are arguably the most important part of your hiking attire. Choosing the right socks can mean the difference between an enjoyable hike and a miserable, uncomfortable experience- and there’s a lot more to it than you would think. Follow our guide to help you decide which socks are best for you.
Why are hiking socks important?
- They cushion your feet to make your hike more enjoyable and comfortable.
- They wick moisture away from your feet to help prevent blisters and keep your feet dry.
- They keep your feet warm when hiking in winter or adverse weather.
- They reduce blister-causing friction.
- They can be used to improve boot fit, but only very small amounts.
Points to keep in mind when choosing your socks:
- Never wear cotton socks when you go hiking. Cotton absorbs moisture and takes time to dry.
- Wear woollen socks to stay warm and wick away moisture. These socks tend to be the most expensive. Look for Merino Wool for softer, finer fibres.
- Socks made from synthetics are great if your feet tend to sweat a lot because they wick moisture away better than natural fibres.
- Thicker hiking socks tend to be more durable. The thickness can also help improve the fit of a boot that is ever so slightly too big. It might be best to consider wearing thicker socks in the morning and changing into a thinner pair after lunch when your feet have swelled a bit with all the walking.
- Seams should be flat so they do not create more pressure points on your foot.
- Socks should have good elastic stretch at the top so they hold to your ankle well and don’t slip down into bunches in your boot.
- The fit should be snug, but not too tight. Any bagginess or extra material at the heel or toe means it’s too big.
What will you be doing?
Different socks are intended for different purposes. Our own range of socks come in three different weights, each appropriate for a certain type of hiking:
Lightweight:
Our Walklite Socks (men’s and women’s) are the lightest of the three weights. They are intended for hiking in warmer weather, or for shorter hikes that won’t put your feet under too much pressure.
Mid-weight:
Our Hikemid Socks (men’s and women’s) are the perfect all-rounder socks. They will keep your feet warm and well protected from blisters. They are intended for a good intensity level of hiking and will wear well.
Heavyweight:
Our Trek Comfort Socks (unisex) are a heavy weight sock. They are very durable and are intended for long-distance hiking in cold weather. They are the perfect boot-filler if your boots are slightly on the big side.
If you need any more information, or a little help choosing the right socks for you, we are always on hand to help. Get in touch with us through one of our social media pages and we will be happy to answer your questions.
Find out more about our socks here.
November 06, 2014
Lucy Stevenson
What To Do If You Get Lost Hiking

The most important thing to consider before you set off on your journey is the possibility of getting lost and what you should do if this happens. Getting lost while hiking, especially when you are exploring somewhere new you are not familiar with, can be very serious and even fatal if you don’t manage the situation correctly. Follow our steps below to make sure you will know what to do if this happens to you.
Before you go
- Plan your journey. Where are you going to go? How long will this take? Make sure you are familiar with your map and you have a compass that you know how to use. Don’t just study your route- have a look at the surrounding area so you will know which direction is best to head in if you get lost.
- Tell a friend where you are going and what time you expect to be back. If you are not back at this time or shortly afterwards, they will know to raise the alarm. It is also a good idea to leave a copy of your planned route with your friend so that mountain rescue will know where to start looking for you.
- Make sure you have a fully charged mobile phone with you. Up in the mountains, it is likely you will have no network reception but keep it with you anyway and keep it turned off to conserve the battery. If you follow our steps below, you might be able to make your way to somewhere that does have reception.
During your hike
Remember prevention is better than cure! There are a few things you can do on your way to make sure you don’t get lost in the first place.

- Leave markers. You can create markers from sticks and stones in the shape of an arrow etc. This way you can just go back the way you came if you are unsure of your forward route.
- Observe your surroundings as you go. Are there any natural sounds that stand out along the way like a noisy fast-flowing river? Maybe there is a funny shaped tree or other distinctive natural feature you can keep in mind.
- Take pictures. If you have a camera, you can easily just look back and take a picture of the way you came. You can also include your hand pointing in the right direction in the photo.
So you forgot to leave markers and now you’re lost. What next?
- Stop and assess the situation. Get your map and compass out and look around for any big landmarks or anything that will help you find your bearings.
- Stay calm and maintain a positive mental attitude. This is the most important thing to remember. If you panic, you won’t be able to think straight. If you can't think straight, you won't be able to help yourself.
- Orient yourself. If you have no map or compass (or are so far gone that you can’t possibly figure out how to use it effectively), you can still get a general idea of your location by looking at the position of the sun. Remember that the sun rises in the east and sets in the west. Remember studying the surrounding area on the map before you left? This is how you can determine where to go next.
- If you still can't find the trail, look around for a nearby river or stream. Follow it downstream. This will eventually lead you to civilization.
- If nightfall approaches and you don't know where you are, it is usually wiser to stay put and try to find your way home in the daylight. By this stage there will probably be someone looking for you anyway. Look for shelter somewhere that will keep you dry and reasonably warm. Leave something out that will attract attention if someone is looking for you like a brightly coloured bandana or scarf.
- If you have a whistle, blow it. The sound may attract help. The sound from a whistle travels much farther and is more easily located than the sound of a shout.
© 2026 Target Dry | E-commerce by WeMakeWebsites


Lucy Stevenson
Author